Tuesday, October 30, 2012

Burlap on the Table

I'm loving burlap right now.  I've always been a "granola" kind of girl, but recently, I have begun to develop an affinity for bold patterns and metallic finishes.  When our dining room started taking shape, my new appreciation of silver, grey, and bold patterns had overpowered my tendency to use muted, warm, neutral colors.  Enter the drop cloth curtains, our antique dry sink, and burlap.

I had been looking around for an inexpensive table runner.  The cheapest I found were almost $20.  I had seen burlap used for everything from reupholstering chairs to pillow covers to wreaths.  It seemed that using burlap to make a table runner would be easy, inexpensive, and beautiful.  (Turns out, as with most of "my" ideas, a slew of other people had already done it. )

This project was SO easy.  It took about five minutes.  All you need is burlap and scissors. 

I found burlap for $3 a yard.  To figure out how much fabric you need, just measure your table, adding about eight ten inches on both sides.  I bought three yards because I wanted to have extra for other projects.


The burlap I found already had a slightly fringed edge.  After cutting the width of the runner, I wanted the newly cut side to match the fringed side.  In order to do this, I just grabbed the ends of a few threads and pulled them away from the fabric, a few inches at a time.  I ended up taking out five or six strands.


I realize this isn't the best shot of the dining room or the runner, for that matter, but it gives you an idea of what it looks like.  I feel it really helped draw together the silver/grey tones, the rug's pattern, and the natural tones of the curtains and the dry sink. 


Since this photo was taken, we've hung a few things on the walls and added a centerpiece.   Stay tuned.  We're planning on giving you all a video tour of the house in the coming weeks.

Wednesday, October 17, 2012

Curtains on the Cheap: Drop Cloths, Hem Tape, and Paint

Our first apartment was a tiny and dark basement apartment.  It wasn't until we were moving out that we found out that our neighbors had dubbed it the "mold pit."  While Jordan and I did a pretty good job of making the size issue work (we regularly crammed 20 people in a space that was probably about the size as our current living room), we never really got over the lack of light.  When we walked through our second apartment, the first thing I noticed was the light.  (Ok, maybe it was the second thing I noticed.  I definitely took in the seemingly tripled size before I realized how much light there was.)

932 is brimming with light.  There are windows everywhere.  This thrills me.  However, it also poses a bit of a privacy problem.  While I am inexpressibly thankful that our home's previous owner left blinds on all of the windows in our house (with the exception of the sunroom windows), I simply can't handle plain white blinds without curtains.  In all of my attempts to learn the rules and tricks of home design, I have learned that curtains, hung high and wide, make a drastic difference in the ambiance of a room.  If you don't believe me, start taking note of home spaces to which you feel most drawn.  I bet that you will find that window treatments make a world of difference in your perception of the space and, quite frankly, everything in that space.

But, let's face it.  Curtains are expensive.  I spent hours, days, and weeks, searching for affordable curtains.  The curtains that I liked were anywhere between $20 and $50 a panel.  Yep.  Do the math.  In a room that has two windows, that's between $80 and $200 for curtains.  And that doesn't include curtain rods.  Not happening.

Enter drop cloths.  I had, at least a year ago, seen a DIY blogger on the Nate Berkus show (R.I.P.) make curtains from drop cloths and was astounded by their simple beauty.  After searching for pre-made curtains and then for fabric, I decided that drop cloths were worth a try. 

As I didn't have a sewing machine, I decided to use hem tape.  This is on par with the greatest inventions ever.  Seriously, all you need is hem tape and an iron and voila, you have a hem. 

Here's the thing.  A 6x9 drop cloth costs about $10 and is enough fabric for two panels.  Hem tape costs between $3 and $5.  Unpainted, that ends up being about $6 a panel.  If you want to paint your curtains like I did, you may end up spending closer to $10-12.  My living room curtains, all said in done, cost about $40. 

Hemming the curtains is pretty self explanatory.  Measure the length, floor to curtain rod, you need for your curtains.  Cut the cloth to these measurements, remembering to leave a few inches on the top and bottom so that you can fold the fabric over and hem it.  You can either make rod pockets or you can use curtain clip rings.  I prefer the rings as they make the curtain much easier to move around on the rod, but rod pockets keep your cost down.  Simply fold the fabric over and hem along the bottom of the fold so that you create a pocket at the top of your curtain.

Once you've hemmed the curtains, you can leave them as is or you can paint them.  I made curtains for the dining room and living room.  I painted the living room curtains, but have not yet painted the dining room curtains.  They look great as-is, but I doubt I'll be able to resist painting them.

We painted stripes on the curtains.  This is by far the easiest design.  People do some pretty amazing things with paint and fabric.  To paint stripes, make sure you use a measuring tape to ensure even spacing.  Remember that you are painting between the tape, so you need to take the width of the tape into account.  Trust me, this is hard to remember. 


We used regular latex Olympic paint.  I had paint leftover from painting the desk, and it was close to the color I wanted to use, so we went with it.  We ended up using about a quart and a half on this project.  To get the paint on the curtains, we used paint brushes, but you could use rollers as well.


To save yourself the headache of measure more than once, just line up your second panel with the first.
 

This was not a project without mishaps.  I ruined an entire panel, halfway through the process because I absentmindedly began panting the wrong stripe.  I was so angry.


The paint dried in a couple of hours and the curtains were ready to be hung!


 We finished the project over the span of a week or two.  It does take time.  It takes me about an hour to cut and hem two panels and another hour to paint them.


 Because of the width of the double windows and the length of the radiator underneath them, I decided to forgo my original plan of having two floor length curtains framing the window.  The panels weren't quite wide enough to cover the windows and frankly, it just looked silly having the panels hanging with so much space in between.  So, the solution was to make three shorter curtains for the window.


Obviously, a lot of other things have happened in the living room since your last glimpse, but, more on that another day. 


Wednesday, September 19, 2012

The Story of An Abandoned Desk

Let me tell you a story about a desk.  It had been left by the side of the street, unwanted, tossed aside, fated for destruction.  But one day, a girl was driving by and spotted the forsaken desk.  Having spent the last months entirely absorbed by Pinterest and DIY blogs, she saw in the desk a beauty just waiting to be revealed.  All it needed was a little elbow grease and paint.

The girl asked her boy if he would help her get it home.  The sad desk had been abandoned only a few blocks from their house.  Unable to fit it in their car, the pair carried it home at nine o'clock that night.  We can all be sure the neighbors had a good chuckle watching the new couple on the street lug the desk down the middle of the road.

I was that girl, and this is my desk.  Before the transformation that is...


We went to work as soon as we could.  To do something like this, one only needs sandpaper (admittedly, an orbital sander would make the project a million times easier), a few tools, primer, and paint.  

There was an ugly and broken rubber trim around the top of the desk.  I spent about fifteen minutes trying to get a tiny piece off and had nearly given up hope when Jordan came to my rescue.  He spent at least an hour prying that stuff off using a hammer and a flat head screwdriver.  


At this point, I had already sanded down the desk's bones.  So, while he worked on the trim, I sanded down the drawers.  

I read a lot of different opinions regarding sanding.  Some people feel that to get the smoothest finish, you should sand down to the bare wood.  Others say that it is only necessary to get the sheen off of the varnish.  The primer that I bought said that no sanding was necessary.  Because the desk was old and had been well used, the varnish was already peeling and made for a very bumpy surface.  It was actually really easy for me to get down to the wood, so I did.


Well, except for the top, which is covered with some sort of laminate.  I just scuffed it up as much as I could to make sure the primer and paint would stick.

The desk had a taken a bit of a beating and had a few bumps and scratches here and there.  I grabbed a container of Elmer's wood filler and filled it in and smoothed it out.  I applied this stuff around the trim as well to fill the space the rubber once occupied.  The great thing about this product is that it is easy to use and can be sanded down once it dries.  You don't have to get it just right when you apply it. 


After another good sanding, two coats of primer, another sanding, two coats of paint, and a coat of Minwax Polycrylic Protective Finish, and another light sanding...we had a desk.  

A note about primer and paint: I chose to use Olympic's Tailspin Linen for the "bones" of the desk and Allen + Roth's Rain Puddle for the drawers and top.  Both are available at Lowes.  I bought a quart of each for this project and still have plenty left.  I followed the instructions of John and Sherry over at YoungHouseLove and used an oil based primer.  You CAN use latex paint over an oil based primer, just not over oil based paint.  It is important to apply two or three THIN coats of primer to ensure a more smooth final finish.  

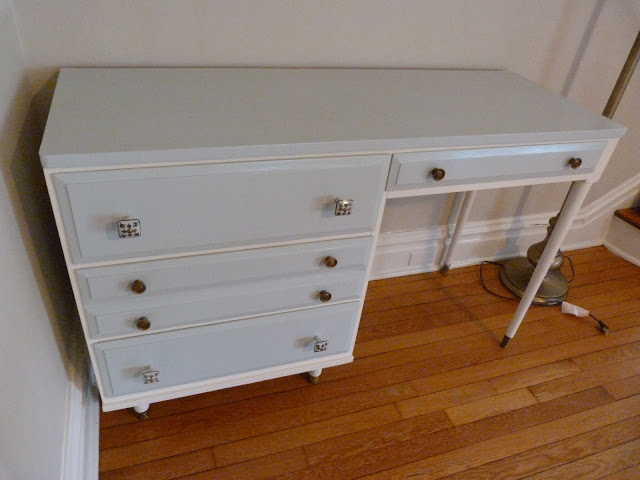
Without further ado...here is our beloved desk:


I wanted some fun hardware for the desk and just happened to find some over at Rule 42 on Byers Street.  The owner, Dawn, does an amazing job salvaging and painting old furniture and has a friend who refinishes pieces.  She also carries a lot of fun decorative items as well as paint, hardware, and other helpful DIY stuff.  To keep the cost down, I decided to only get four and utilize the hardware that was on the desk when we found it.


A few last shots...The oval mirror and the banjo-back chair are other items we got at the yardsale.  I plan to cover the chair seat with new fabric.  Any suggestions for colors?


A quick cost breakdown:

Desk -- FREEBEE
Primer -- $10 (we have 3/4 of the quart left, so this will go a long way)
Paint -- $25 (again, we have a lot left.  Also, a big thanks to my parents as they bought the paint for us!)
Minwax -- $10 (this stuff is pricey, but again, you only use a little bit at a a time.  It will preserve the furniture much better than the paint alone so, while it is not absolutely necessary, I recommend it.
Hardware: $21 (Each knob was actually $6 a piece, but Dawn offers a 15% discount to MBC students!)

Total: $66 that will go a lot further when I use leftovers for other projects!


Saturday, September 15, 2012

The Back Porch: Spray Painting A Yard Sale Table

While living in our apartment, Jordan and I found ourselves longing for space outdoors.  While the apartment we lived in was on the top floor of a large house with a large yard, we never felt comfortable making use of the space outside.  On walks, we would spot people lounging on their porches and practically drool over the thought of having a place to soak in the morning sun, coffee mug in hand, and read a good book.  This desire was probably bordering on covetousness.  But, what can you do?

When we moved into 932, we were in heaven.  Not only did we love the inside of the house, but we loved that we had both a front and a back porch.  There was only one problem.  We had no outdoor furniture.  Ok, there were two problems.  The other problem was that outdoor furniture was way out of our budget.

I decided that I wanted to get a small patio table for the back porch as it felt more like the space we would use for eating, homework, et cetera.  After searching thrift stores for weeks, I was certain that we would just have to save our pennies and wait until next spring or summer.

One morning two weeks ago, we headed over to some friends' house to feed their cat while they were out of town.  (Ok, I need to brag a minute.  Those friends were Charles and Nicki, and they were out of town because they were becoming Ironmen for the second time.)  We spotted a yard sale at their neighbors house and stopped to survey the scene.  Twenty dollars later, we walked away with a really cool oval mirror, an antique banjo-back chair in great condition, four sweet metal chairs, and a small, round, wicker top table.

That's right, folks.  We had outdoor seating.  The chairs cost $2 a piece, and the table cost $7.

For reasons that I think are relatively obvious, I knew I had some work to do.  The table seemed tall and bulky compared to the chairs.  I decided that a change in the table color might do the trick.  

Enter two cans of spray paint.


If you've ever spray painted anything before, you know that it is fast and easy, but that the fumes are nearly intolerable.  If you haven't, and want to, here are a few tips:
  • Wear a mask (so many thanks to my wonderful neighbor Henry for letting me borrow hers).  
  • Shake the can for about a minute before you start painting and continue to shake it frequently throughout the process.
  • Spray on your first coat, wait five minutes, and then add your second coat.  (Some spray paints may require you to wait longer between coats.  Just check the can's directions).  Continue this process until you are satisfied.  
  • Give the piece a full 24-48 hours to dry before using it.  It's worth the wait!
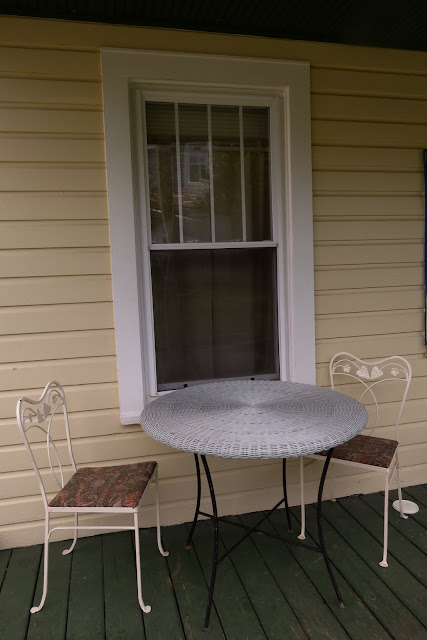
The picture below is after two coats.  I ended up doing four as wicker is a bit tricky to get covered.


After the cost of the spray paint, this table cost a whopping $15.  Woot!

 Now, we just need to get some new fabric on the chairs...


Wednesday, September 12, 2012

932 Before

It occurred to me that perhaps before we get too far into all of the stuff that we've been doing at casa Leahy, you might want to see what it looked like before we moved in.  So, here are some photos taken on the day of our inspection (during which we had three hours to walk around and imagine what we would do with the space).

These photos were not taken very intentionally, so forgive the poor quality.  Also, count how many Jordan photo bombs there were.

Into the living room...


And the dining room...


 The kitchen (oh, boy, do we have some work to do in here in the future)...


the pantry


 The bedrooms (there are three, it is hard to tell the difference in these)


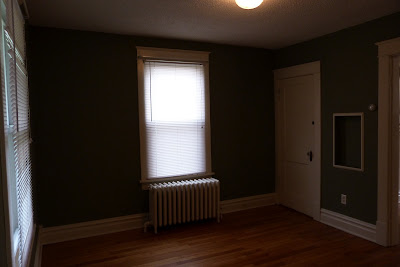
This room is the smallest and is now our study.  It leads into the sleeping porch, seen below.


The guest bedroom...


Our bedroom


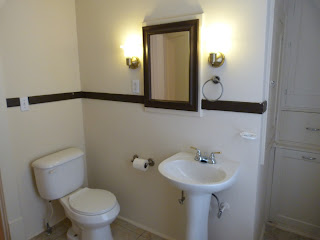
The bathroom...

There is a lot of funky/great storage space in this little nook.  The bottom space is actually a hamper


And the porches...


You might be seeing some of these again so that you can compare what was, what is, and what will come.