Wednesday, September 19, 2012

The Story of An Abandoned Desk

Let me tell you a story about a desk.  It had been left by the side of the street, unwanted, tossed aside, fated for destruction.  But one day, a girl was driving by and spotted the forsaken desk.  Having spent the last months entirely absorbed by Pinterest and DIY blogs, she saw in the desk a beauty just waiting to be revealed.  All it needed was a little elbow grease and paint.

The girl asked her boy if he would help her get it home.  The sad desk had been abandoned only a few blocks from their house.  Unable to fit it in their car, the pair carried it home at nine o'clock that night.  We can all be sure the neighbors had a good chuckle watching the new couple on the street lug the desk down the middle of the road.

I was that girl, and this is my desk.  Before the transformation that is...


We went to work as soon as we could.  To do something like this, one only needs sandpaper (admittedly, an orbital sander would make the project a million times easier), a few tools, primer, and paint.  

There was an ugly and broken rubber trim around the top of the desk.  I spent about fifteen minutes trying to get a tiny piece off and had nearly given up hope when Jordan came to my rescue.  He spent at least an hour prying that stuff off using a hammer and a flat head screwdriver.  


At this point, I had already sanded down the desk's bones.  So, while he worked on the trim, I sanded down the drawers.  

I read a lot of different opinions regarding sanding.  Some people feel that to get the smoothest finish, you should sand down to the bare wood.  Others say that it is only necessary to get the sheen off of the varnish.  The primer that I bought said that no sanding was necessary.  Because the desk was old and had been well used, the varnish was already peeling and made for a very bumpy surface.  It was actually really easy for me to get down to the wood, so I did.


Well, except for the top, which is covered with some sort of laminate.  I just scuffed it up as much as I could to make sure the primer and paint would stick.

The desk had a taken a bit of a beating and had a few bumps and scratches here and there.  I grabbed a container of Elmer's wood filler and filled it in and smoothed it out.  I applied this stuff around the trim as well to fill the space the rubber once occupied.  The great thing about this product is that it is easy to use and can be sanded down once it dries.  You don't have to get it just right when you apply it. 


After another good sanding, two coats of primer, another sanding, two coats of paint, and a coat of Minwax Polycrylic Protective Finish, and another light sanding...we had a desk.  

A note about primer and paint: I chose to use Olympic's Tailspin Linen for the "bones" of the desk and Allen + Roth's Rain Puddle for the drawers and top.  Both are available at Lowes.  I bought a quart of each for this project and still have plenty left.  I followed the instructions of John and Sherry over at YoungHouseLove and used an oil based primer.  You CAN use latex paint over an oil based primer, just not over oil based paint.  It is important to apply two or three THIN coats of primer to ensure a more smooth final finish.  

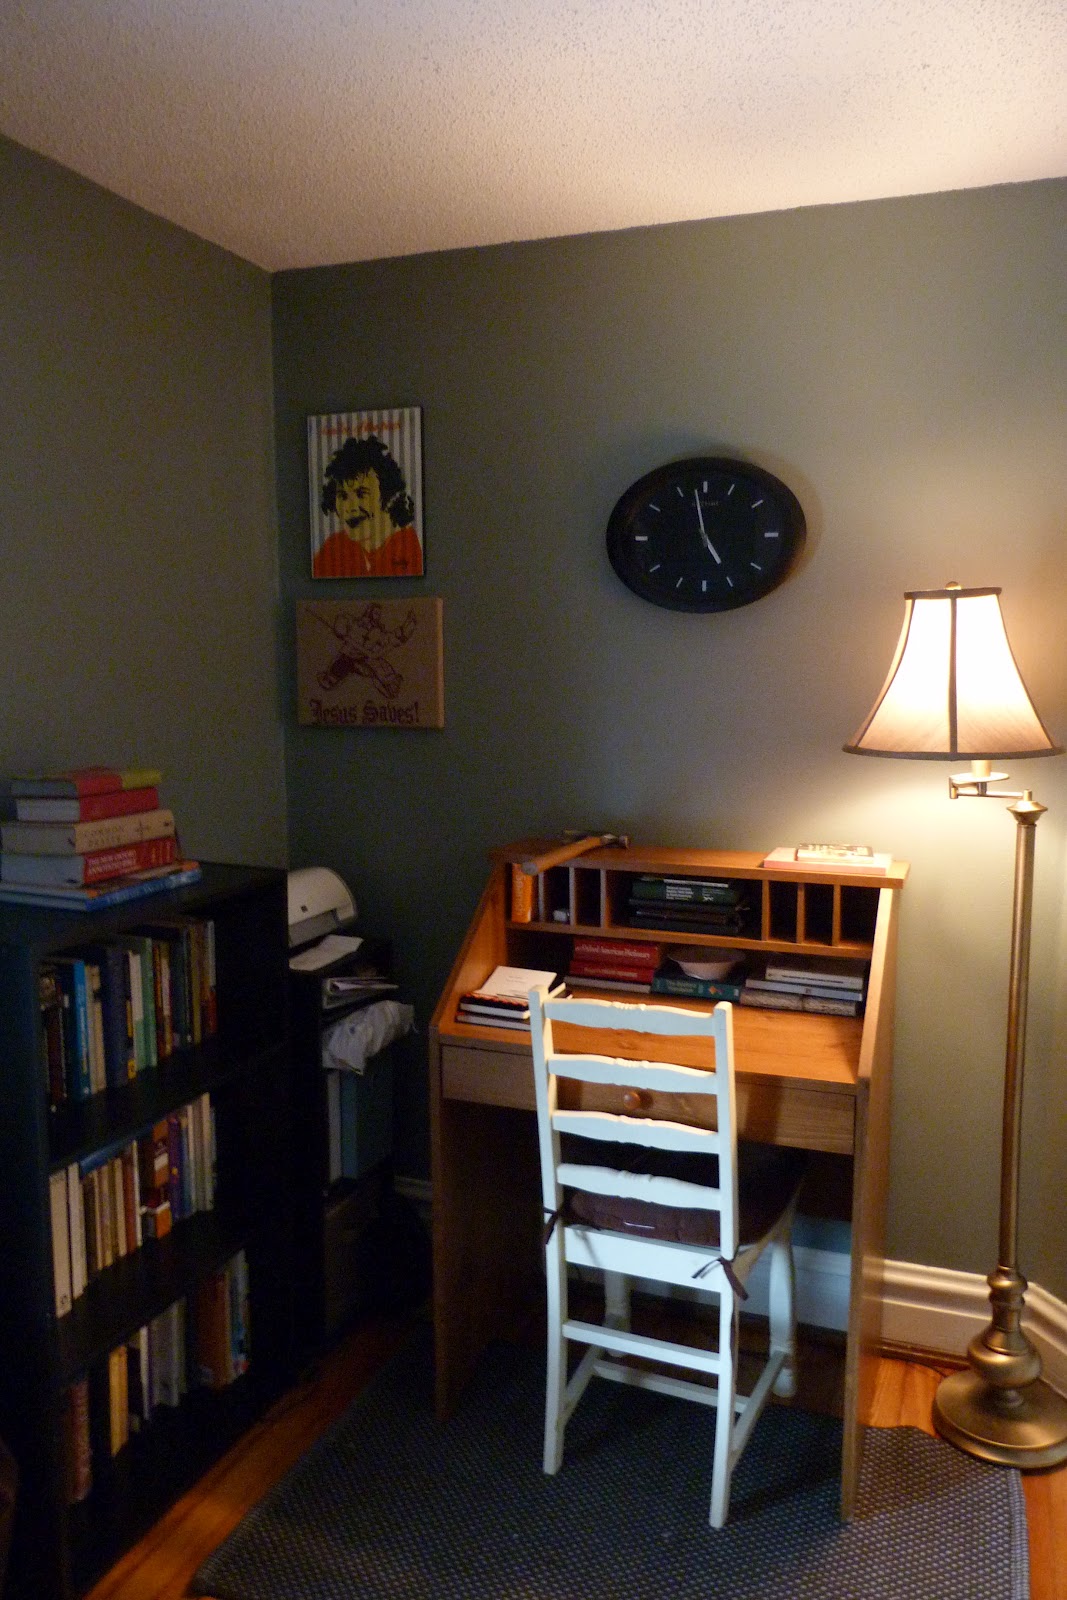
Without further ado...here is our beloved desk:


I wanted some fun hardware for the desk and just happened to find some over at Rule 42 on Byers Street.  The owner, Dawn, does an amazing job salvaging and painting old furniture and has a friend who refinishes pieces.  She also carries a lot of fun decorative items as well as paint, hardware, and other helpful DIY stuff.  To keep the cost down, I decided to only get four and utilize the hardware that was on the desk when we found it.


A few last shots...The oval mirror and the banjo-back chair are other items we got at the yardsale.  I plan to cover the chair seat with new fabric.  Any suggestions for colors?


A quick cost breakdown:

Desk -- FREEBEE
Primer -- $10 (we have 3/4 of the quart left, so this will go a long way)
Paint -- $25 (again, we have a lot left.  Also, a big thanks to my parents as they bought the paint for us!)
Minwax -- $10 (this stuff is pricey, but again, you only use a little bit at a a time.  It will preserve the furniture much better than the paint alone so, while it is not absolutely necessary, I recommend it.
Hardware: $21 (Each knob was actually $6 a piece, but Dawn offers a 15% discount to MBC students!)

Total: $66 that will go a lot further when I use leftovers for other projects!


Saturday, September 15, 2012

The Back Porch: Spray Painting A Yard Sale Table

While living in our apartment, Jordan and I found ourselves longing for space outdoors.  While the apartment we lived in was on the top floor of a large house with a large yard, we never felt comfortable making use of the space outside.  On walks, we would spot people lounging on their porches and practically drool over the thought of having a place to soak in the morning sun, coffee mug in hand, and read a good book.  This desire was probably bordering on covetousness.  But, what can you do?

When we moved into 932, we were in heaven.  Not only did we love the inside of the house, but we loved that we had both a front and a back porch.  There was only one problem.  We had no outdoor furniture.  Ok, there were two problems.  The other problem was that outdoor furniture was way out of our budget.

I decided that I wanted to get a small patio table for the back porch as it felt more like the space we would use for eating, homework, et cetera.  After searching thrift stores for weeks, I was certain that we would just have to save our pennies and wait until next spring or summer.

One morning two weeks ago, we headed over to some friends' house to feed their cat while they were out of town.  (Ok, I need to brag a minute.  Those friends were Charles and Nicki, and they were out of town because they were becoming Ironmen for the second time.)  We spotted a yard sale at their neighbors house and stopped to survey the scene.  Twenty dollars later, we walked away with a really cool oval mirror, an antique banjo-back chair in great condition, four sweet metal chairs, and a small, round, wicker top table.

That's right, folks.  We had outdoor seating.  The chairs cost $2 a piece, and the table cost $7.

For reasons that I think are relatively obvious, I knew I had some work to do.  The table seemed tall and bulky compared to the chairs.  I decided that a change in the table color might do the trick.  

Enter two cans of spray paint.


If you've ever spray painted anything before, you know that it is fast and easy, but that the fumes are nearly intolerable.  If you haven't, and want to, here are a few tips:
  • Wear a mask (so many thanks to my wonderful neighbor Henry for letting me borrow hers).  
  • Shake the can for about a minute before you start painting and continue to shake it frequently throughout the process.
  • Spray on your first coat, wait five minutes, and then add your second coat.  (Some spray paints may require you to wait longer between coats.  Just check the can's directions).  Continue this process until you are satisfied.  
  • Give the piece a full 24-48 hours to dry before using it.  It's worth the wait!
The picture below is after two coats.  I ended up doing four as wicker is a bit tricky to get covered.


After the cost of the spray paint, this table cost a whopping $15.  Woot!

 Now, we just need to get some new fabric on the chairs...


Wednesday, September 12, 2012

932 Before

It occurred to me that perhaps before we get too far into all of the stuff that we've been doing at casa Leahy, you might want to see what it looked like before we moved in.  So, here are some photos taken on the day of our inspection (during which we had three hours to walk around and imagine what we would do with the space).

These photos were not taken very intentionally, so forgive the poor quality.  Also, count how many Jordan photo bombs there were.

Into the living room...


And the dining room...


 The kitchen (oh, boy, do we have some work to do in here in the future)...


the pantry


 The bedrooms (there are three, it is hard to tell the difference in these)


This room is the smallest and is now our study.  It leads into the sleeping porch, seen below.


The guest bedroom...


Our bedroom


The bathroom...

There is a lot of funky/great storage space in this little nook.  The bottom space is actually a hamper


And the porches...


You might be seeing some of these again so that you can compare what was, what is, and what will come.


Friday, September 7, 2012

Jordan's Worldview in Two Frames or Less: T-Shirt Canvas

About a year ago, Jordan and I were wandering through a thrift store.  If you haven't yet put two and two together, we go thrifting a lot.  That is, I frequently request that we visit "a thrift store or two" and Jordan obliges me by spending the next several hours standing around, mindlessly flipping through t-shirts that will never fit, while I scour the shelves.  

On this particular thrift store adventure, Jordan approached me with a t-shirt in his hand, a gleam in his eye, and a brilliant smile on his face.  Why?  Because he had unearthed this gem...


For a hockey-loving-Jesus-follower like Jordan, this shirt was just too perfect.  Kitschy?  Maybe.  Awesome?  Yes.  Four sizes too large?  Definitely.  

We bought it anyway.  

What to do with the beloved oversized t-shirt?  Why not make art?

I decided to buy a canvas to display the t-shirt's design.  Both the shirt and the canvas sat in my dresser drawer for a year, but when we moved, they came to my attention and I finally decided to take ten minutes to do the project.

If you ever encounter a t-shirt that you can't wear, but cannot leave on the shelf, or, if you have a t-shirt that has seen better days, but you cannot throw away, here is a super easy project for you.  Wouldn't this be so fun to do with a t-shirt your child outgrows?  I've also seen photos of canvases covered with pretty fabric on Pinterest and they are lovely.

You'll need:

A t-shirt or fabric
Scissors
Staple gun (this is preferable.  I actually just used a standard stapler.)
Canvas 

This is so easy, I'm not sure anyone needs directions, but just in case...

Position the canvas over the portion of the fabric you want to preserve.  Cut this portion of the fabric, leaving enough on all sides to fold over the edges of the canvas.

Staple along the edges, using as many staples as you need to ensure that the fabric is secure.  Fold the fabric around the corners to create neat lines, and staple the corner fabric together.


When you have finished, trim the fabric as needed.


BAM.  You're done!


Obviously, mine is not perfect.  I stretched the fabric a bit and distorted the letters a bit.  Ah, well.

I hung this in our study along with one of Jordan's birthday presents, a spray painted Bobby Clarke image by an artist in Philly.  


Thursday, September 6, 2012

A $3 Lighting Solution (sort of)

A few weeks ago, I had an idea for what I hoped would be a cheap lighting solution for our study.  It was simple.  All I needed to do was procure a large, drum shaped lampshade.  I would remove the old light fixture and attach the shade in its place.  Brilliant, right?

Oh, yeah.  Everyone from YoungHouseLove to Ikea to upscale designers thought so.  DIYers had done it time and time again, and Ikea and the other designers had produced shades specifically for this purpose.  For example, here is really beautiful example from Shades of Light, for $179.

So, two or three thrift stores later, I found a $3 solution at Goodwill.  That's right.  Three American dollars.  And that actually included a very large and very gaudy lamp that I donated back to Goodwill immediately after removing the shade.  While it wasn't exactly the drum shade I was looking for, it was close enough.

This is what we started with.


After removing the bowl, we found this.


Unfortunately, after unscrewing the metal plate, we found that, although there is a center hole in the plate itself, there is a bar running across the plate that does not have a hole.  Also, this plate is covered with insulation, thus making it difficult to work with.  So, we threw around some ideas, came up with some good thoughts, and ended up propping the shade up on the lightbulb bases (forgive my inadequate terminology) until we figured it out.  Hence...


Three weeks later, we haven't made any attempts a longer term solution.  When we figure something out, I'll let you know.  Or, if you have a great idea, let me know.  Also, I now feel that we need to secure some fabric or something to the bottom to both diffuse light and make for a more attractive underside viewing.


If you're wondering, the paint color is Fisherman's Wharf by Allen + Roth and is available at Lowes.  


The rugs are from Target.  They are so cozy!